Steve Greaves
Photorealism Painting
Techniques & Methods
| Carly, Portrait of an Art Student - Painting Tutorial |
| 1. The Reference Photograph |
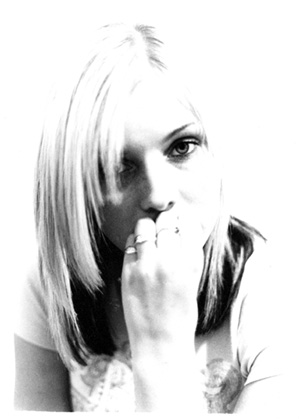
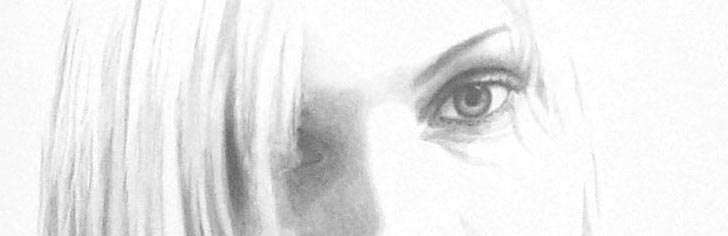
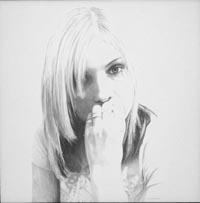
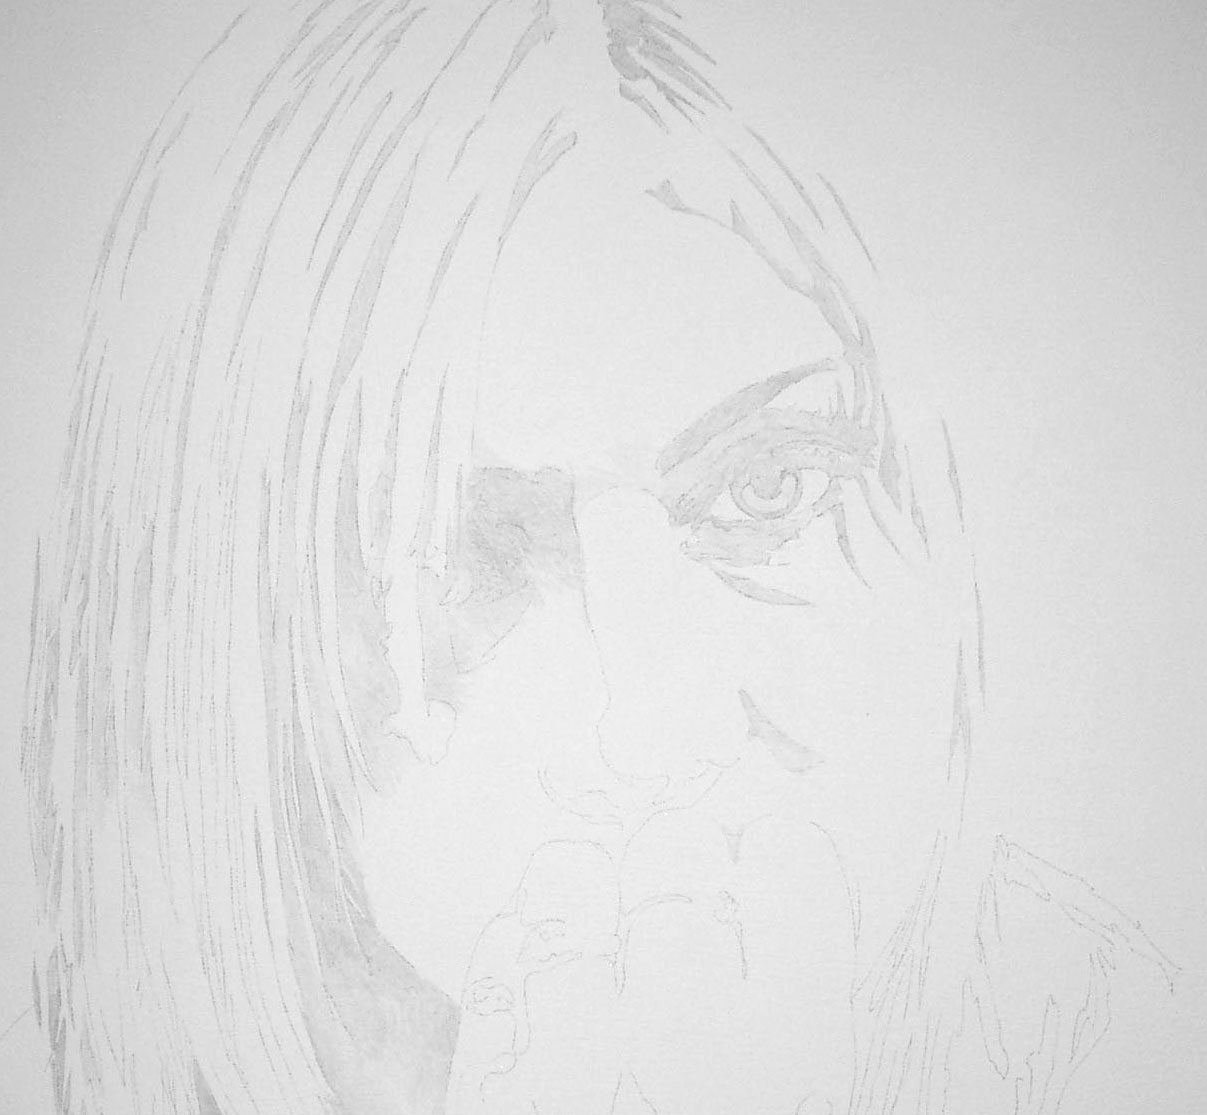
Carly Reference Photo (light version)
The reference photo for Carly - Photorealism
portrait painting was taken with an old battered
Olympus 35mm SLR film camera with a 50mm lens
using Ilford FP4 black and white film.
It was taken in a white painted room with
flourescent lighting. A single tungsten spotlight
was used to give highlights and strong contrasts.
The photo was developed and printed in
a school darkroom using the most basic
of materials and equipment. Two 10" x 8"
prints were made, each with a different
exposure to show details in both the
highlights and the lowlights.
The lighter print was scanned and then
inkjet printed onto A2 size photo quality
matt paper.
| 2. Drawing / Copying & Transferring the Image |
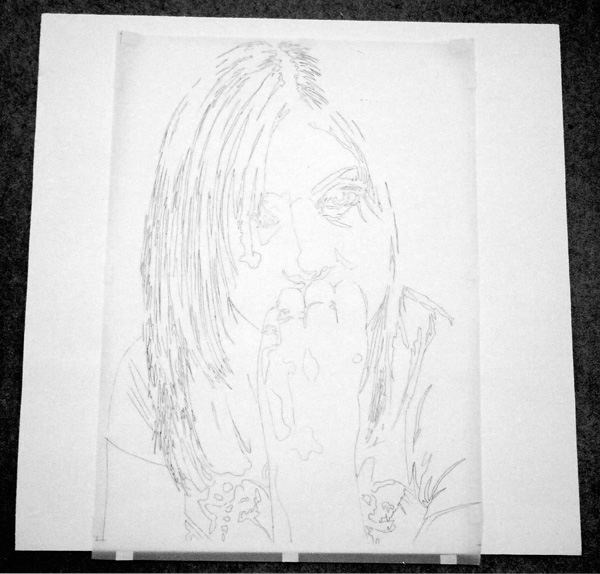
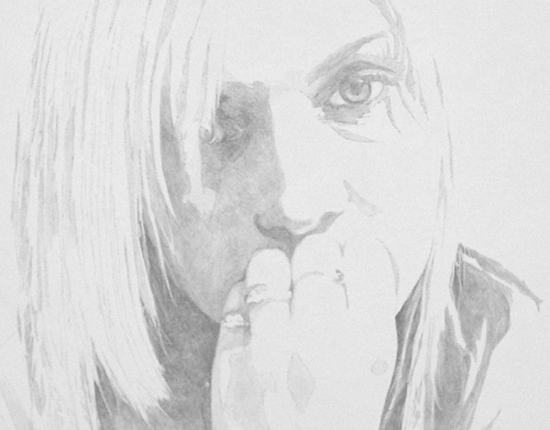
The drawing of Carly ready to be transferred
onto the gesso primed board. The
composition has been changed
to a more powerful square format.
The image was copied onto A2 transparent acetate
with a fine pigment pen - then from that onto A2
tracing paper using the same pen. Then the
image was redrawn on the back with a soft (2B)
pencil.
Finally the image was traced through the
paper onto the gesso primed board using a hard
(6H) pencil. Tracing is not an easy option. It can
take days of intense accurate drawing to transfer
a detailed image.
Pigment pens are used on the acetate and tracing
papers but the image is always laid down onto the
support in pencil. A putty rubber is used to remove
any excess pencil marks.
| 3. Painting & Painting Materials |
Carly - Photorealism Portrait Painting in progress
The painting after 3 painting sessions (detail)
The support used for this painting is hardboard
(masonite) which was roughly sanded on the
smooth side to give it a key and then given 6
coats of white acrylic gesso using random
brush strokes. The surface was left un-sanded
though small blobs were removed with a sharp
scalpel.
Carly - Photorealism Portrait Painting in Progess
The painting after 10 painting Sessions (detail)
The painting was built up gradually using thin
layers of Payne's Grey acrylic paint mixed with white.
It was painted using a size 3 Winsor & Newton
Sceptre Gold brush and took 31 painting sessions
to complete making a total of around 50 hours.
| 4. Framing the Painting |
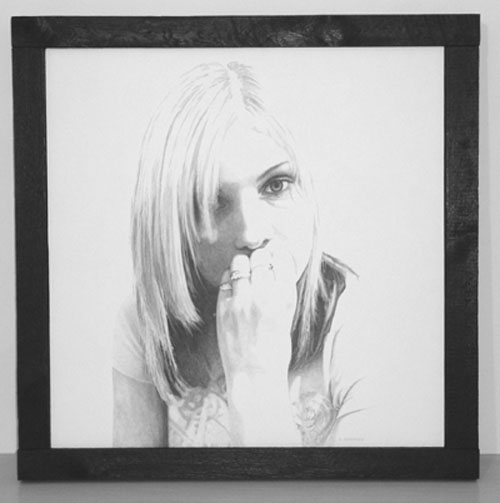
Carly - Photorealism Portrait Painting - Framed
The Carly portrait painting is framed very simply with
2 x 2 ins rough sawn timber which is butt-joined and screwed
at the corners. Small metal L-shaped brackets are glued to the
back of the board, and screwed into the frame to hold
the painting in place.
The picture frame is painted satin black which gives a
contemporary feel and hints at Japanese simplicity.
There is a balance between form and emptiness
in the painting, and a contrast between the texture
of the frame and the subtlety of the image.
Click here to buy Steve Greaves Original Paintings
Steve Greaves
Photos on Flickr
www.flickr.com
|
Steve Greaves uses
Nikon D300 Camera.
You can get yours here:
Photorealism
Art Prints & Posters

Bugsey Art Print
Kleemann, Ronald
16 in. x 20 in.
Buy at AllPosters.com
Realism Painting
Art Books
Bird
Photo Book
Wildlife
Photographer
Of The Year
Photo Book
John Salt
Photorealistic Painter
The Complete Works
Richard Estes
Photorealism Painter
Richard Estes
Photorealism Painter